What Is Intaglio Printing?
Intaglio printing is a form of printing that involves carving an image on a metal plate, which is then covered in ink and transferred to paper. The marked line holds the ink and creates the image. The name intaglio derives from the Italian intagliare, meaning ''to carve'' or ''to engrave'', a reference to cutting the image into the metal plate. People have used intaglio printing techniques for hundreds of years; some early examples of intaglio printing include playing cards made in Germany in the 1430s using drypoint. Several types of intaglio printing include etching, drypoint, engraving, aquatint and mezzotint. This blog post will introduce each type of printing method and then explain how to create an intaglio print.
Etching
The first surviving dated etching was created in 1513 by Urs Graf, a Swiss artist. To create an etching, you must first coat a metal plate with an acid-resistant etching ground made from paint, wax, asphaltum or oil pastels. Using an etching needle, draw the lines of your design on the etching ground to expose the metal. Lay the plate into a mild acid bath. The exposed lines will be 'bitten' by the acid, recessing them beneath the surface of the plate. To create deeper and darker lines, leave the plate in the acid for longer.
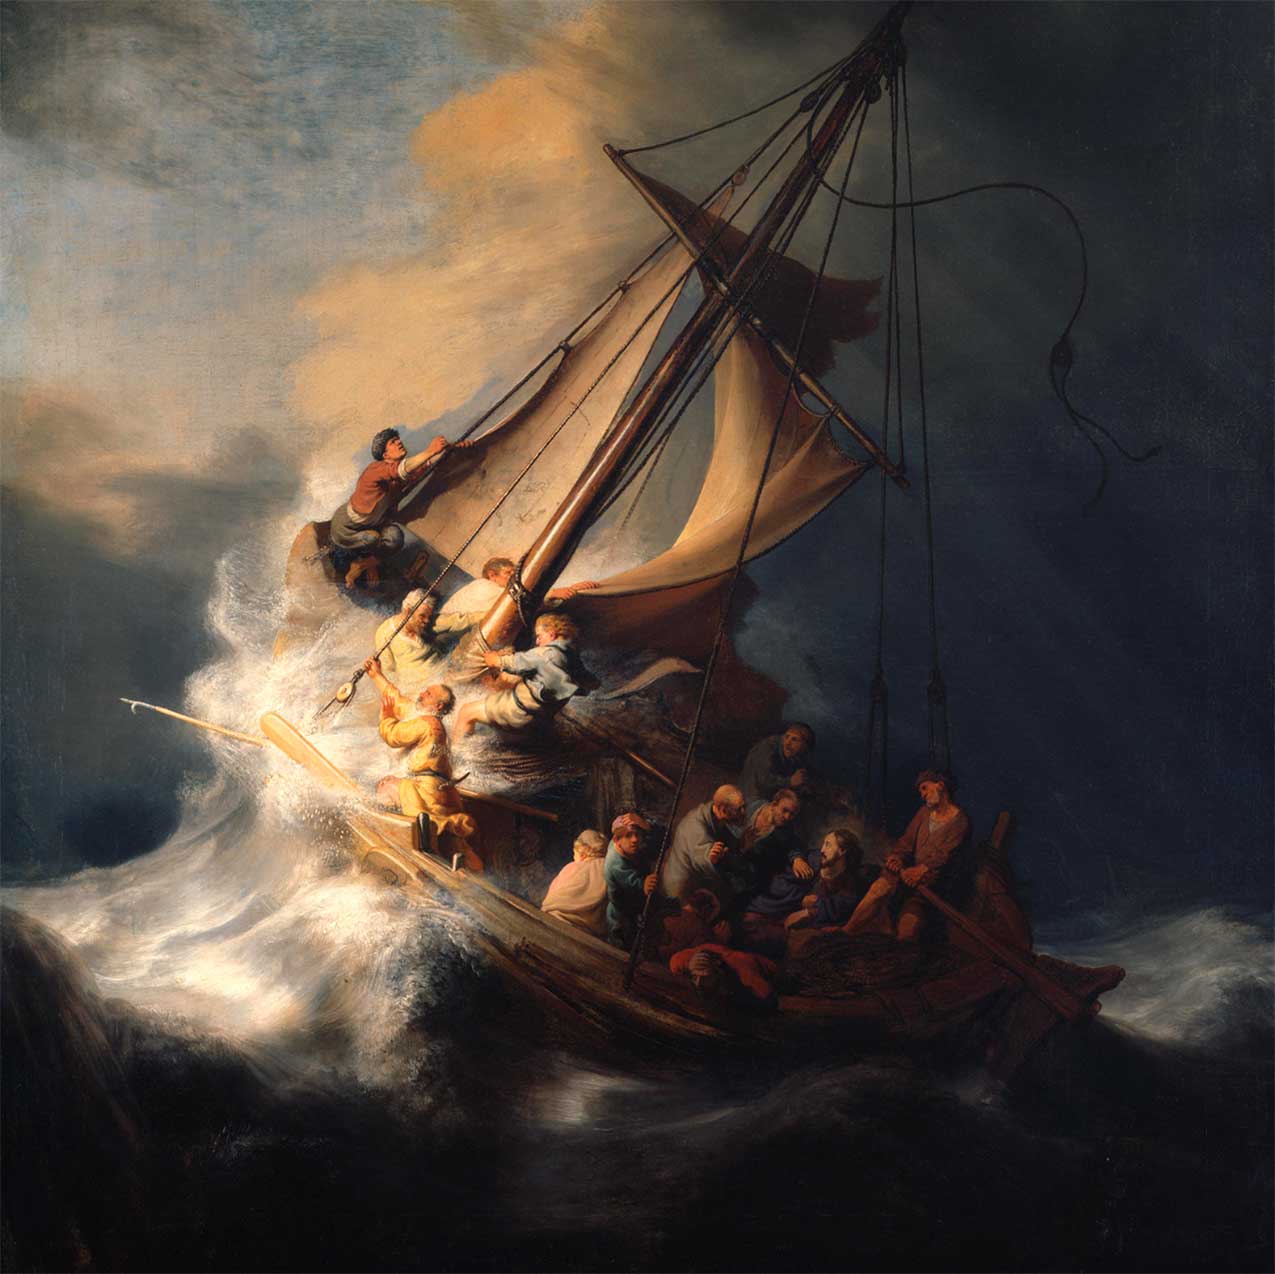
This etching, Large sculpture gallery built on arches and lit from above . . ., by Giovanni Battista Piranesi, circa 1750, is a beautiful example of the detail and tones that can be achieved.
Drypoint
Drypoint etching is created by hand using a diamond-tipped tool to carve a design on a metal plate, raising an edge on the plate called a burr. The plate is then carefully covered in ink and pressed onto damp paper. The plate can only be used a few times before the weight of the press crushes the burr. This technique does not require an acid solution as part of the process because the burr (not the line) retains the ink. The burr has a rough edge and creates a soft, feathery line, as seen in this example of etching and drypoint in brown on laid paper, Marguerite Gachet in Lantern Light (Marguerite Gachet à la lanterne) c. 1891, Norbert Goeneutte (1854 - 1894)
Engraving
Goldsmiths have used engraving to adorn their work since ancient times and would take a paper impression of their designs to record their work or check the quality of a piece. Scholars and printmaking practitioners believe this practice might have inspired the idea of making prints from engraved plates.
You can create an engraving by cutting your design into a copper plate using a burin. This tool comes in various sizes and has a diamond-shaped head, making a line width that goes from thick to thin (unlike an etching which usually has lines of the same width). To create a curve, you must move the plate, not the tool. The printing plate is inked, and the excess ink is wiped off, leaving only the ink in the etched areas. Paper is then pressed onto the printing plate, resulting in a printed design, such as this engraving of foetal skeletons by Ruysch "Thesaurus anatomicus", 1701-16.
Aquatint
Aquatint is a printing technique that uses tone instead of a line and uses powdered rosin (made of pine resin) to create a tonal effect. The resulting piece resembles a watercolour. It derives from etching and is often used with etching techniques to create a work combining tone and line, as seen in the example below by Mary Cassatt, Woman Bathing,1890–1. Aquatint was invented by the Dutch printmaker Jan van de Velde IV in around 1650. A well-known example of aquatint can be found in The Birds of America by John James Audubon (with colour added by hand).
To create an aquatint plate, first, etch a copper plate with your design, degrease it, and then coat it with rosin powder. Heat the plate, so the rosin powder melts and sticks to it. Once the plate has cooled, paint an acid-resistant substance (known as stop-out) in the areas you do not want any tone (you can also use a litho-crayon to create a softer texture). Submerge your plate into acid to be 'bitten'. The longer the plate is exposed to the acid, the darker the tone will be. To preserve a tone, you can remove, rinse, dry your plate, and apply a stop-out to the section you want to keep intact. Continue to darken the tone of the rest of the plate by re-submerging it in the acid bath. You can also incorporate etching techniques like scraping and burnishing to create texture.
Mezzotint
The Step-by-Step Process of Intaglio Printing
Now that we've discussed the history of intaglio printing let's see how it is made.
1) The artist or printmaker first creates an image on a metal plate using several methods we've discussed, such as engraving, etching, or drypoint.
2) The entire metal plate is covered with ink using a roller, ensuring the ink is squeezed into every line and cut. Then, using a tarlatan cloth, the excess ink is removed from the surface of the plate, leaving only the ink in the recessed areas.
3) At this point, the inked metal plate is ready to be printed. It is placed on top of a sheet of dampened paper and run through a press. The pressure from the press forces the paper into the tiny crevices on the surface of the metal plate, picking up ink as it is rolled.
4) After being run through the press, the paper is dried and then fixed so that the image will not smudge or fade over time. The final product is a unique print with rich detail and tones.
Level Up Your Creative Practice
Introducing the ultimate creative powerhouse: The Mega Bundle by Vault Editions! Boasting an incredible 7,531 high-resolution images from 37 of our most popular titles, this digital bundle is a must-have for anyone looking to take their designs to the next level. But that's not all – we've also included five print-at-home craft eBooks and a digital copy of our Tattoo Lettering Inspiration Reference Book. The creative possibilities are truly endless.
Whether you're a professional designer or just starting out, this Mega Bundle will blow your mind with its stunning collection of images and an impressive variety of genres. From anatomy and medical illustrations to insects and botanical art, this bundle has something for everyone. And with the ability to quickly create client designs, impressing your peers has never been easier.
We know that delivering quality work on time is critical, which is why all of our images are high-resolution files, ensuring that your final products will look nothing short of amazing. So why settle for mediocre designs when you can go all out with the Vault Editions Mega Bundle? With so much creative potential at your fingertips, the possibilities are truly endless. Get your hands on the Mega Bundle today and take your creativity to new heights!


_MET_DP827988.jpg)